Warn PowerPlant and Viking winch line install
Nearly a year ago I dropped a Warn PowerPlant HP winch + air compressor with some Viking Offroad winch line in to my front bumper. Here are some install instructions and thoughts on it all.
First off, I went with the Warn PowerPlant Dual Force HP rather than the HD
. I'd originally placed an order for the HD but David from Northridge 4x4 called me up and talked with me about my intended application, and decided that the HP was a better deal. It is slightly cheaper, but more importantly it pulls faster. The Jeep Wrangler isn't big enough to need the extra pulling power of the HD 12000 the HP's 9500 is more than sufficient.
Second, I ordered synthetic winch line from Viking Offroad. Specifically black 3/8" x 100 ft line with a safety thimble on the end. The synthetic is safer (no deadly cable snap, no hand-piercing frays), lighter, and doesn't rust or kink. It is more fragile in circumstances where it is being scrapped across the edge of a rock or something - but you just need to put a rock guard down in that case.
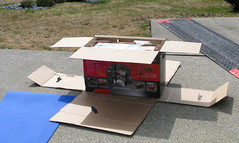
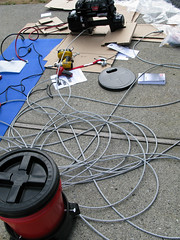
Anyway, this thing comes packed pretty well. The easiest thing to do is take the entire box to your jeep and slice down the sides, peeling the box away. Do this on both the outer and inner boxes, and slowly take the loose components out of the packaging.
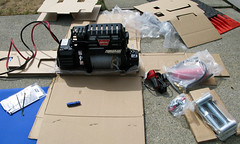
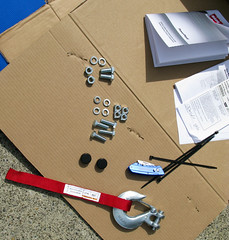
There are not very many pieces, this should be easy... Unfortunately there are a couple pieces missing from this picture which I did not discover until later - something that would have taken 2 easy-minutes ended up taking 20 angry-minutes.
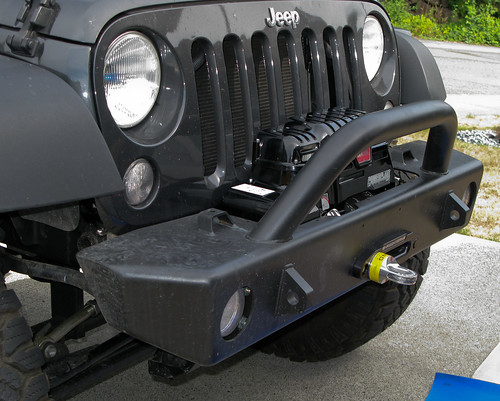
My Shrockworks front bumper has a skid plate that needs to be removed to access the bottom winch plate bolts.

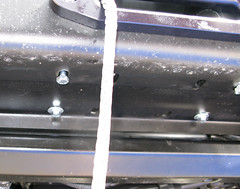
Here is the winch mounting plate looking down - since the skid plate has been removed you can push bolts up through those holes. There are multiple holes so various types of winches can be installed without modification. Go ahead and mount your fairlead at this time.

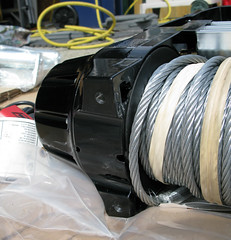
Next step is to get rid of the metal cable that was pre-installed. Do this by setting the winch in 'free spool' mode and just pulling it off. Make sure you wear gloves or your hands will get eaten up. When you get to the end there is a screw on the side of the spool that you remove to fully disconnect the cable.
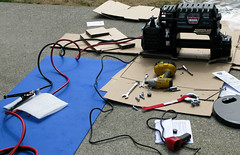
Before going through the effort of installing, do a quick check to make sure the winch actually works. I used jumper cables to get power down to the ground.
The hardest part of the install will be getting it in to the mounting location. I put a foam mat over the front grill. It wouldn't protect if I dropped the winch, but it would keep minor dings and scratches at bay. Lowering the heavy winch in to place would be made easier if there were two people, or even easier with a strap on a hoist.
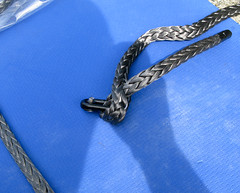
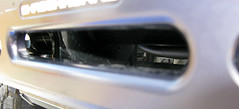
With the winch in place next step is to hook the winch line back up. Unlike the cable that originally came pre-installed, the replacement synthetic line has a 'safety thimble' on the end that is much larger than the original 'eye loop' and can not be fed through the fairlead. Feed that screw part through the front of the fairlead, reach a hand under around around the back, rotate the spool until you can find the hole and then rotate it so the hole is at the bottom, you need to have the line wrapping in the correct direction, and then cuss about how hard it is to screw it down tight.
Next step is to loosely attach bolts through the bottom of the mounting plate in to the feet of the winch. Once all four are in you can slide the winch around to get it positioned how you want it. Then you can tighten things up (make sure you don't forget your washers).
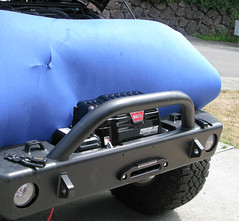
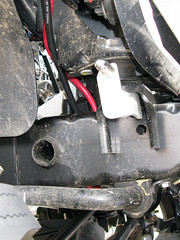
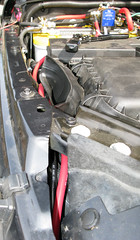
Route the power cables in a manner similar to these pictures, making sure to avoid any pinch points or sharp edges. When routing cables it is sometimes helpful to push a string through in the opposite direction (so from the top, dropping down) that you can then tape the ends of your larger cable to to pull it back through. Connect them directly to the battery (or to a heavy duty fuse), real in your line, and you are done.
But! A few days later I opened up what I thought was just the bag with the air compressor accessories - a thin hose and tire inflator. Alas, I discovered that there was an air filter in that bag, and that the air filter needed to be mounted in the engine bay.
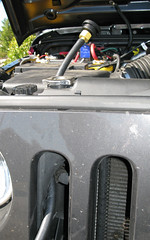
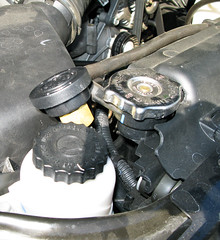
Attach the adaptor to one end of the hose, attach the air filter to the adaptor, thread the hose down following the path that the radiator lines follow. Keep pushing it through until the air filter is about at the same level as the other caps in that section of the engine bay.
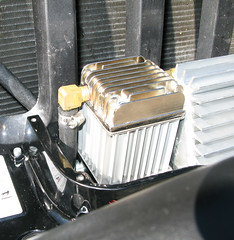
Remove the top of the winch (5 bolts and it pulls off) and thread the hose to the inlet on the compressor. Cut the hose to the correct length.
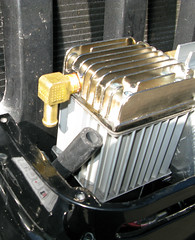
Now here is the hard part. If the winch wasn't jammed in to the bumper you'd be able to get your hand easily around the hose from behind. Since I'd already mounted the winch, getting this extremely tight hose all the way on to the inlet was a 20 minute curse-fest. My knuckles were bruised, had cuts on my hands, and my finger tips were raw. Using some alcohol-based lube helped but it was still difficult. Tighten up the hose clamp and put the top of the case back on.
Now you are really done.
Thoughts:
1) Of course connecting that air hose would have been way easier if I'd done it before dropping the winch in to the hole
2) I would have replaced the provided power cables with thicker ones (like these from Benchmark Designs) before installing - the power connectors are down at the bottom, probably impossible to get to without pulling the winch
3) If i'd waited on the line just a little bit longer I could have gotten a thimble that had a rubber puck behind it so it wouldn't scratch up the fairlead (purely cosmetic)
4) Also if I'd waited even longer I could have gotten a black anodized thimble instead (also purely cosmetic)
5) 3 of the bolts that hold the top half of the winch case on have rusted - they rusted in about 3 months. I need to get replacements (they are each different lengths, not standard Home Depot items), and after installing them I'll hit them with some paint to seal them.
![]()
No comments:
Post a Comment