Jeep JK Shrockworks bumper
Zombie Killer's Shrockworks front bumper was installed back in April 2010, but I didn't have the Warn winch until August 2010. I was going to do one big write-up but it ended up too long, so I'll break it in to the two parts. Then I got super lazy and started failing at blogging... so now it is almost a year later.
Expand this entry for the walkthrough of the bumper installation.
The bumper I selected was the Shrockworks Mid-Width front bumper. There are a couple different front bumpers that look really nice and have similar features, so there is no reason to get the Shrockworks. Reviews at the time said that this company was worth the wait, but I don't know. It is nice, but I wouldn't recommend the company itself.
The wait was over 4 months and they charged my credit card in-full at the time of order. (When the credit card companies catch on these guys are going to be in trouble.) Aside from the long wait, they sent some of the wrong things (ordered black shackles they sent polished stainless steel) and the bumper itself was damaged in a number of places (not just chipped powder coating but actual gouges in the metal). The entire time communication from them ranged from non-existent to horrible.
The features I used to narrow my search were:
- Mount points for factory fog lights (In retrospect this isn't very important, I kept the factory fogs for a year but will probably replace them in the next 3-6 months)
- mid- to full-width (mid prefered, no stubby),
- mounting points for aux lights, winch hoop (no stinger)
- inset winch hole (not top mount)
- mounts for D-rings (no hooks)
- install that didn't involve welding or cutting the frame
The instructions were adequate, but should have included a full parts list so I'd realize some bolts were missing before I got halfway in to things. Their instructions plus my color pictures (click to enlarge) and comments should be enough to get anyone through the install on their own.
Removing the OEM front bumper is not rocket science, but there are a couple tricks. Getting the plastic push-rivets out of the flat decorative piece was a pain, I ended up taking punch to them. Once the two rivets are out you can slide the piece to the side pretty easy. You aren't removing it yet, just pushing it out of the way for access to bolts on each side.
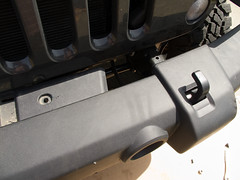
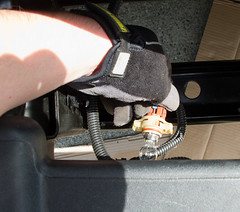
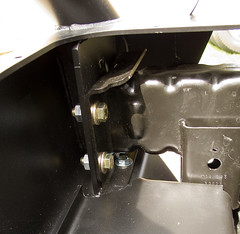
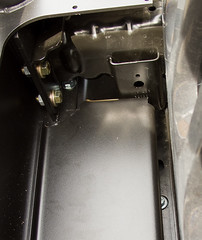
Throughout the steps you'll find that turning the wheels to one side or the other will give you better access. Here you can see how the metal bar that runs the width of the bumper connects with a couple bolts to the frame mounts.
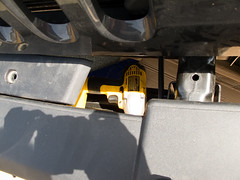
No amount of manual ratcher or electric drill worked. I went to the electric impact driver. Each side is mounted with 4 bolts, the inner pairs being the most difficult to get to. I actually put the battery through the opening first, then the drill body, then the socket. Once in the cavity I was able to attach them - it wouldn't fit otherwise.
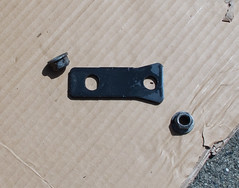
Here is one of the brackets and nut pairs that hold the bumper to the mounts. There are 4 of these units.
Before pulling the bumper off, remove the bulbs from the fog light housing. There are apparently a couple different styles, mine worked different than the instructions said. Mine you just squeezed and twisted.
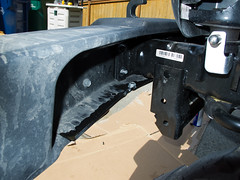
With both bulbs out you can pull the front bumper off. You need to remove the two foglight housings with a screwdriver if you didn't buy aftermarket fog replacements.
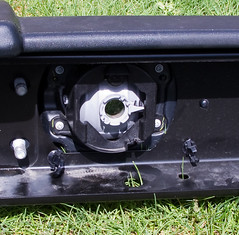
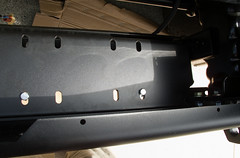
And here is what your Jeep will look like. When putting the new pieces together make sure you don't break the bulbs or pinch the wires. The two stock foglights are wired to each other.
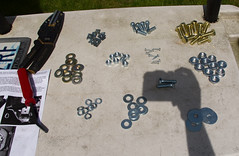
A picture of the included fasteners. There ended up not being the correct distribution of bolt lengths/washer sizes, but a trip to Home Depot fixed that.
Here is a trick for getting a bolt connected to a tricky location. Press the nut on to some painters tape really well, then move the tape around until the nut is in place, and press the tape against the surface to hold the nut in place.
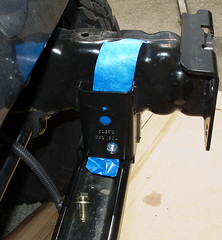
The tape holds the nut enough to get a little bite on it. Once you are good and connected you can just yank the tape and it will come out - or just leave it in, it is just paper and will eventually deteriorate. This first bolt is holding the winch plate on by the way.
Sliding the new metal bumper on is a little tricky. You can do it yourself if you use some straps to help keep it from falling while you screw around with the bolts. There are all sorts of regular washers, and lock washers, and nuts that you have to get in the right places. Some of these can be quite frustrating.
Drop some bolts in for some dry fitting / alignment.
Don't tighten things fully yet.
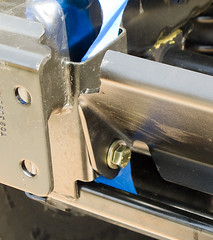
The silver one here is tricky, box end wrenches and locking pliers are very helpful in soem of these tight spaces. Sometimes you are putting these wrenches on bolt heads and then aligning them so they press against some other piece of metal for resistance, because there is not way to have your hands on both of your tools at once.
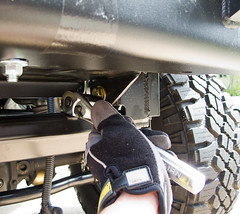
Did I say some were tricky? Check out the one beneath the winch plate - it is in the lower right of the pic, you can only see half the head in the shot, and that is more than you can see when you are trying to tighten it! Skinny arms that have two elbows are helpful here.
Loosely mount the skid plate. Bolts go through the skid plate, bumper, and winch plate so keep things loose for alignment. You want things as 'perfect' as possible. If either of the plates are not lined up it doesn't matter when you are just putting loose bolts through, but when you are trying to line the winch up it would be a huge pain.

Tighten things up and you are almost done. I didn't take pics of mounting the fogs back, it is just a couple screws and is covered in the directions. You'll see one of the fog bulbs still dangling.
You need to (very) carefully cut the tape around the bulb wiring harnesses. The new bumper configuration requires more wire length between the bulbs, so you have to make use of the slack that was bundled up. Twist the bulbs in and you really are done!
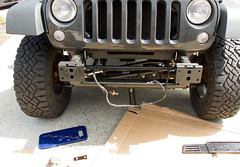
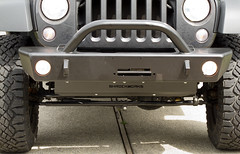
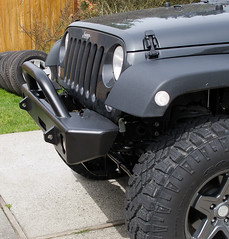
With the mid-width you have a lot more tire visible from the front, helpful on approaches - plus it just looks cool.
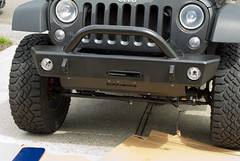
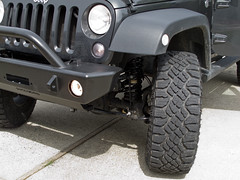
Side shot where you can see one of the aux light mounting tabs, and the angle of the winch guard hoop.
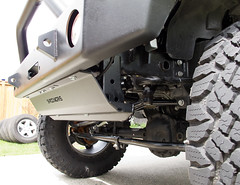
Undershot showing the skid plate. They say the plate is designed to protect your Rubi electronic discos too.
The bumper weighs more than the original rubber one, but doesn't pull the front down too much. The springs were still pretty new at the time I did the install and took these pictures.
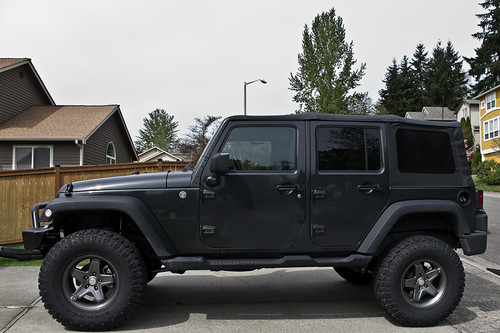
It is now a year later, and I've had no problems. A couple spots around the light tabs had poor powder coating so they developed small surface rust, but that was easily taken care of.
![]()
1 comment:
It looks very attractive on your Jeep. And I just appreciate how well you did the job there. I'm really impressed!
Post a Comment